Cloning my voice and trying to prevent it
DeepFakes and other generative technologies that enable image, audio and video manipulation are becoming more and more powerful and at the same time easier to use. With that rise it is only natural that we will also see a rise in counter measures to protect your own image or voice against cloning.
Last week I cam across such a tool called AntiFake. It reports to manipulate the audio in such a way that if your audio is used to try to clone, or synthesize, your voice it won’t sound the same.
I read through the website at the time but didn’t look to deep into it. Now I had sometime to investigate the samples more closely. Note that this report is just going off the provided samples, as I couldn’t get the code up and running on my machine, that might be a Me/Windows issue.
Let us start off by listening to the first row of audio clips here. First what I noticed is the amount of static introduced in the AntiFake Protected clip makes this very hard to listen to for me. It sounds like a weird elctronic river is flowing behind the main audio. But listing the synthesized voices they do not sound very similar to the original input voice.
So this gave me my first pause. While the technique does seem to be effective it also seems to reduce the audio listening expierence quite drastically - and I wouldn’t call myself an audio file by any means. But let’s continue on.
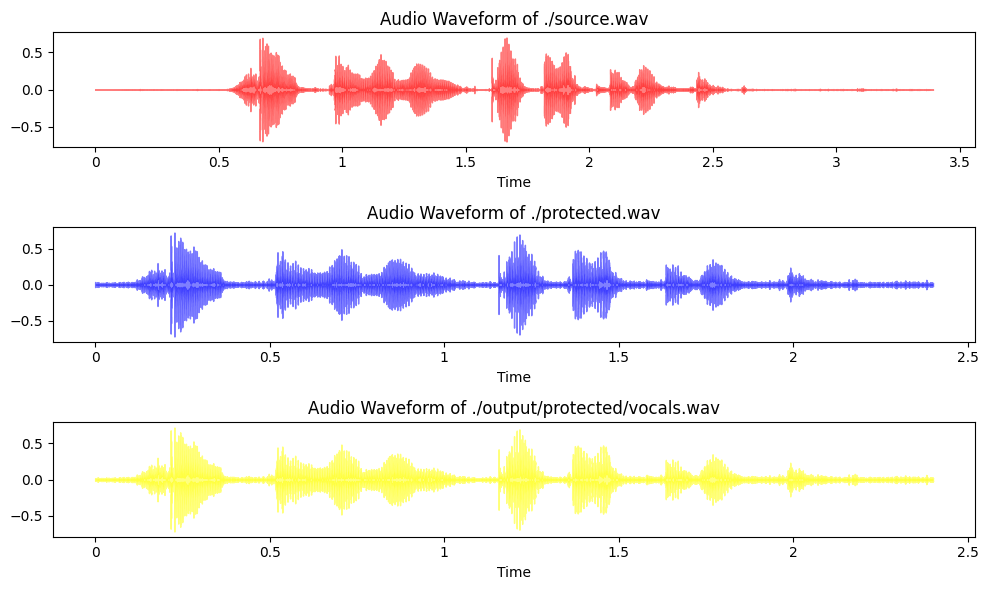
First I downloaded the Source and AntiFake Procted .wav files to take a look at their wave lengths and visualize the differences - here is the sample script for doing it:
import matplotlib.pyplot as plt
import numpy as np
import librosa
import librosa.display

unprotected_audio_file_path = './source.wav'
protected_audio_file_path = './protected.wav'
differences_output_image_path = 'differences_waveform.png'

def visualize_audio_differences(file1, file2, output_path, name1, color1, name2, color2, color3):
    # Load the first audio file
    y1, sr1 = librosa.load(file1)

    # Load the second audio file
    y2, sr2 = librosa.load(file2)

    # Ensure both audio signals have the same length
    min_length = min(len(y1), len(y2))
    y1 = y1[:min_length]
    y2 = y2[:min_length]

    # Calculate the difference between the two audio signals
    diff = y1 - y2

    # Plot the differences
    plt.figure(figsize=(10, 6))
    plt.subplot(3, 1, 1)
    librosa.display.waveshow(y1, sr=sr1, alpha=0.5, color=color1)
    plt.title(f"Audio Waveform of {name1}")

    plt.subplot(3, 1, 2)
    librosa.display.waveshow(y2, sr=sr2, alpha=0.5, color=color2)
    plt.title(f"Audio Waveform of {name2}")

    plt.subplot(3, 1, 3)
    librosa.display.waveshow(diff, sr=sr1, alpha=0.5, color=color3)
    plt.title(f"Difference between ({name1} - {name2})")

    plt.tight_layout()
    plt.savefig(output_path, bbox_inches='tight', pad_inches=0.1)

visualize_audio_differences(unprotected_audio_file_path, protected_audio_file_path, differences_output_image_path, 'Unprotected Voice', 'red', 'Protected Voice', 'blue', 'orange')
Running this code yields the following results:
We can clearly see that these files have very different structures and I have to admit I wouldn’t have expected that they look this different. So looking it this I am suprised how good the protected file still sounds even after all of the manipulation. Well my next step was obvious, trying to remove the noise and I took a very simplistic approach to that - I looked into voice isolation techniques.
The first tool I used for that was the website Vocal Remover which enables you to just upload an audio file and you get back a track containing just the music and one with the vocals - I think it is meant for creating instrumental tracks of songs, but hey lets repurpose this tool:
So I downloaded just the voice track and here is the comparison:
The next idea of mine was to use the spleeter model by Deezer which can also be used to try and isolate the voices - after a quick install of both spleeter and ffmpeg - here is the result of that comparison:
And now my final test, how about we run the Vocal Remover mp3 also through spleeter and then compare again:
Now you can see we have gotten a bit closer to the original file, but it isn’t really drastic - but what I can say is that I feel like that the process of Vocal Remover + spleeter has reduced the annoying background artifacts quite a bit listen for yourself:
Now you can definitly still hear it, but it has gotten better over time. The question now remains if tweaking the voice isolation further, maybe using different or additional techniques could you get to a point were both the artifacts are almost gone and you still retain the synthetization protection or would you be able to completly remove these artifacts?
Only time will tell, but I’m sure that this isn’t the end of the road for the cat and mouse game between synthesizers and protectors against it.


